Introduction History Process Thank Yous


Sanding the Barrel

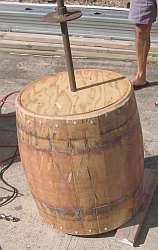
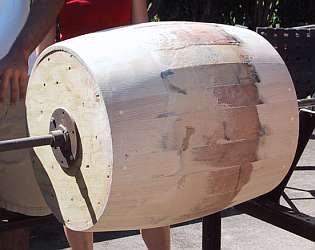
Zenshin Daiko made a sanding jig that significantly reduces the time it takes to get through this stage. However, the jig is difficult to make and to store. All of this stage can be done without the jig: it will just take longer. If you do not have a similar jig, move to the next step (cutting out the center of the plywood inserts) and then sand; this will make the barrel easier to handle.

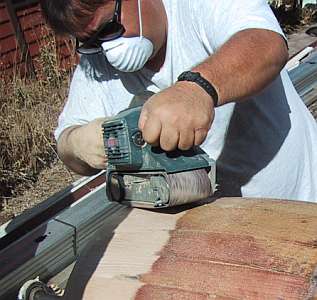
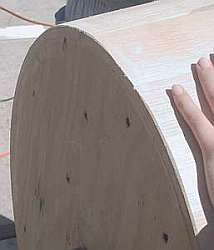
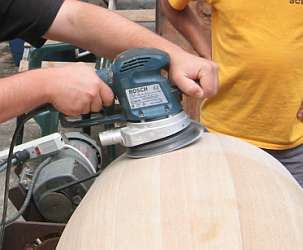
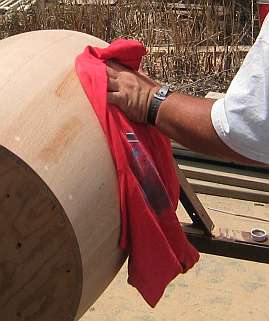
The first few stages of the sanding process are important to shape the barrel. Making it round, evening out unevenness, and removing surface blemishes are the goals at first. As you sand with the belt or orbital sanders, you will be able to feel the parts of the drum that are higher or lower, because the drum will seem to rise and fall as it rotates around. Don't try to push harder into the high spots to get rid of them, instead, try to hold the sander steady, letting the high spots push themselves harder into the sander as they rotate by.

First Stage:

  • To get the barrel onto the "rotisserie," you will have to skewer it on the shaft of the jig. Drill a 1" hole in the center of the plywood inserts on each side of the barrel. Do your best to drill perpendicular to the floor and to line up the holes properly so that the shaft will be straight.

    Drilling Pole Hole
    Click for closeup on drill

  • Insert the shaft into the barrel.

    Speared Barrel

  • Use a belt sander and 40 grit sandpaper to begin. Don't turn on the sanding jig, just have somebody stand on the other side and hold it still as you sand the surface of the barrel. Be careful not to hold the sander in one place for too long: the sander will make that section flat, and you want it round.

    Sanding While Two People Hold Barrel

  • Begin slowly rotating the barrel. Zenshin Daiko's sanding jig has a motor that rotates the drum at about 9 rpm.
  • Sand the barrel while it spins, starting with the two edges of the drum. Hold the belt sander perpendicular to the surface because even a quick cock to the side will gouge the surface. Hold it at about a 45 degree angle with the ground, and keep it in one place as the barrel spins: no need to shift it up and down since the drum is doing the moving. Try holding the sander at different angles (turn it like a steering wheel) to vary the grooves the belt sander is making.

    Belt Sanding

  • The limitations of the barrel are the wide staves, which create flat spots. Don't sit on the parts with extra glue because it will gum up the belt of the sander. Instead, alternate between the parts with glue and wood.
  • On the edge/lip, note the part of the barrel cut out by the 45 degree router bit. Sand up to the top of this section, rounding it out, and working the edge to make a nice angle. The 45 degree edge works as a guide to indicate how much you can sand the edge. In places, it will be smaller, in others it will be larger. If you never sand deeper than the top of the edge, the barrel will be pretty symmetrical when you are through.

    45 Degree Edge Before45 Degree Edge After
    Lip sanded down; some places smaller than others

  • Leave the middle section for the orbital sander, unless there are spots that need it.

    Ends Sanded

Second Stage:

  • Switch to the orbital sander and use 40 grit sandpaper. Sand the barrel in diagonal swipes, and move fast in order to get the high spots and avoid the low spots.

    Orbital Sanding

  • Rather than swirling, stay in one place.
  • The belt sander tends to make parallel groove marks, which you will notice after the first stage. The goal of this stage is to first randomize the grooves, then get rid of them. If you don't get all the grooves out using a certain grit, when you switch to a smaller grit, those marks will stay.

    Grooves from Belt Sander
    Diagonal grooves from the belt sander

  • Sand the barrel twice with each grit: 40, 80, 160, 220 (a smaller number equals a bigger grit). Between every change in grit, wipe down the barrel with paint thinner or mineral spirits and a clean rag. This will remove dust and large pieces of grit from the grain of the wood. Do not use water because it will make the wood swell.

    Wiping Drum

  • The darker staves are usually harder, so they are higher because they are harder to sand down. However, be careful of trying to press down on a harder stave, because you'll likely just wear down the soft edges next to it.
  • After sanding, plug up the 1" diameter hole by gluing in a peg with wood glue. Let this dry.

    Plugged Hole

Back


Drum manual written by Alix Koyama and Dylan Solomon.
Please visit the Acknowledgements page to see the many people who helped us with this project.