|
In this step, the centers of the plywood inserts will be removed, leaving a ring that significantly strengthens the rim of the drum. The inside edge of the rim must be sloped so that the head of the drum won't buzz against it when played.
- If the surface of the plywood is not flush, use the hand planer to smooth it out.
- Find and mark the center of the drum head.
- Measure 1/4" in from the edge of the plywood insert and draw a circle with this radius (line #1).
- Measure 5/8" in from the line you just drew; draw a second circle with the new, smaller radius (line #2).
- Measure 1 1/16" in from the first circle and draw a third circle with this new, even smaller radius (line #3).
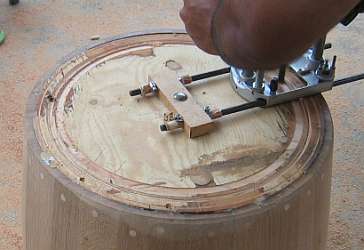
- Using the the router, circle-cutting jig, and the very tip of the 45 degree bit, 'score' line #1.

- Score line #2 by doing the same.

- Pencil in 4 tabs (about 1.5" wide) along the ring in between lines #2 and #3 to mark where you will not cut through the plywood completely, so that the middle of the insert will not fall through when you cut it out.
- Change to the 1/2" straight bit. Line up the point (the center) of the bit with line #3 (have the point just inside the line, closer to the center of the barrel, rather than on the line) and begin cutting out the circle. Plunge a little at a time and pull the router around the circumference. Keep doing this until the bit goes through the plywood.
- When the bit breaks through the plywood, remember not to cut the 4 tabs: when you get to one, raise the router, skip over the tab, lower the router, and keep going.
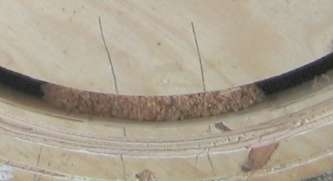
- Change back to the 45 degree bit. Line up the tip of the bit with line #2, which you scored earlier. Turn on the router and plunge it until the edge of the bit is cutting right to the edge of line #1. Pull the router around the circumference. The reinforcement ring should now have a nice 45 degree slope that is steep enough to prevent buzzing when the heads are put on.

- Now, cut off the marked tabs with a jigsaw. Every time you cut one, use a screwdriver as a lever to keep the cut-out from falling into the barrel.

- Use a small belt sander to to smooth the lip on all sides. round off the corners and smooth the wood. Use 40 grit sandpaper to start, and if you want to really finish the lip nicely, use smaller grit sandpaper and work the edges by hand.

- Repeat on the other side.
|
 Introduction
 Process