|
The "traditional" skinning stand, which uses hydraulic jacks and 4x4 beams, is pretty simple. (A note from current webmasters: Rolling Thunder Taiko Source, the original source for this, no longer exists. You can see this type of stand here at timestamp 12:19.)
According to Mark Miyoshi, this is still the method used in Japanese taiko shops. The big plus to this style is that all the parts are modular: as a drum gets bigger, just add more parts. It is also easy to store, since it can be broken down.
Zenshin has developed a different style of skinning stand. It uses cable hoists instead of jacks, and makes it far easier to keep the tension even across the head. However, the stand is not quite as adaptable to different sized drums; while it is easy to scale a drum down in size, it is possible for a drum to be too large for the stand. It is also more difficult to store, because the base is a single unit.
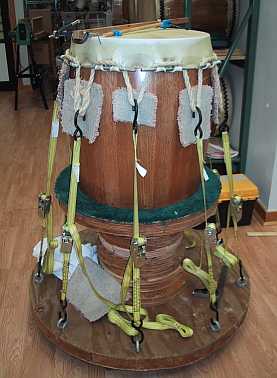
Zenshin-style stretching stand:
- The base of the stretching stand is made from 8 2x12 boards stacked "Jenga" style, screwed and glued: four North-South and four East-West.
- Mount the base on locking wheels to make it easier to move around, but stable when you need it.
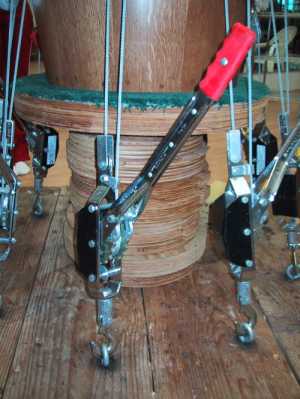
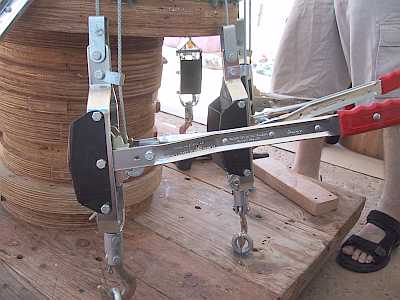
- Screw in 1/2" eye-bolts spaced evenly in a circle around the base. The Zenshin pattern for an 18.5" drum has 9, but it is easy enough to rearrange the eye-bolts to accomodate more or less mimi. The eye-bolts will be what the cable hoists hook to.
- In the center of the base, stack up a column of plywood. Zenshin uses the cut out centers of plywood reinforcements from previous drums. The stack of plywood should be proportional to the curvature and size of the drum: a smaller drum needs to be stacked higher, a curvier drum needs to be stacked lower. Whatever you use to make the stack, make sure it is stable, because the stand will be under a lot of pressure.
- The drum itself sits on a carpeted disk of plywood. This disk should be at least a couple inches thick. Make sure it is centered on the stack because it is under a lot of pressure.
- Zenshin used to use nylon belt ratchet hoists, but switched to steel cable when one of them broke. Search for "Hand-Operated Ratchet Hoists" online, and make sure they have a hook fitting.
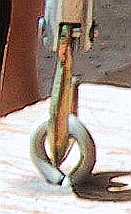
- Any rope strong enough to handle the tension will work. Non-synthetic rope (like hemp) won't stretch as much, keeping the tension in the head of the drum. To prepare the rope, cut a length of it somewhat larger than the circumference of the drum and splice it back into itself to form a ring. Visit http://www.wdcra.org.uk/study/long.htm for instructions on splicing rope, or search Google for "how to splice rope". The ratchet hoists hook onto the ring when it is threaded around the drum. There are no knots to tie, and it is easy to get even tension on all sides of the rope.

- Last are the metal rods (Zenshin uses 3/8" diameter stainless steel, 5 3/4" long) that pass through the mimi holes. The thicker these are, the bigger the mimi when the head is formed.
For an explanation of the skinning process with this stand, click here.
|
 Introduction
 Process