|
Cleaning the staves and gluing them together:
The most important thing to get right in this step is to get the barrel as circular as possible and as "vertical" as possible. If you are not careful, the barrel can easily become oval-shaped, or lean slightly to one side, and there is no easy way to correct this once the glue dries. There isn't much time to get it right, because the glue dries quickly, so make sure you have lots of people helping out during this step so that things go smoothly.
- Lay down a large piece of cardboard or newspaper to protect the floor.
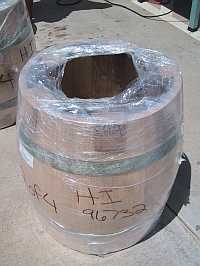
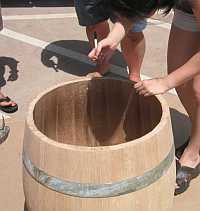
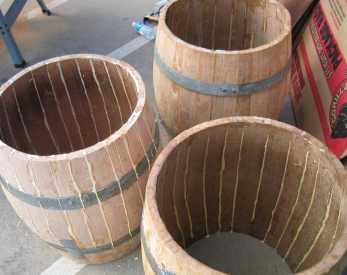
- Unwrap the prepared wine barrels (24" in height, 19 7/8" diameter; the barrel shop removes some staves, resizes the barrel, replaces the rings, and cuts off the ends of the barrel).
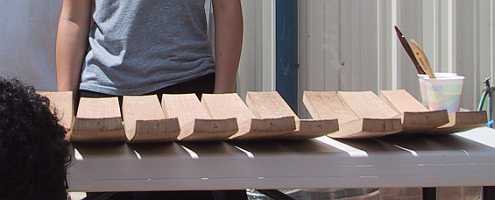
- With a pen or pencil, number the tops of the staves so they can be kept in order when separated.
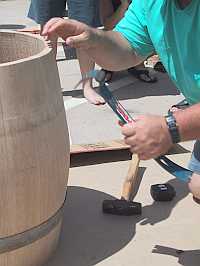
- Take the rings off with a hammer and crowbar: angle the crowbar so the edge is hanging off the ring so that the end of the crowbar doesnŐt get stuck between the ring and the barrel; be careful not to dent the barrel with the crowbar!
 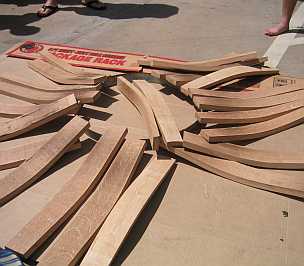
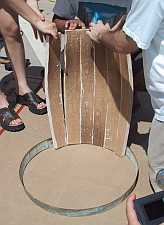
- Line up the staves in numerical order, and if needed, lightly sand the edges of the staves so that there is a good gluing surface.
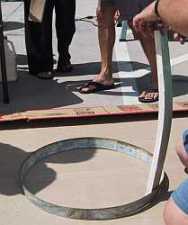
- Put the bottom metal ring on the floor. It will be the guide to help keep the barrel round as it is being glued.
- Fill a small cup or bowl with wood glue and apply with a disposable paint brush.
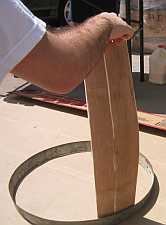
- Paint wood glue on one side of the first stave (the side of the stave adjacent to the second stave).
- Paint wood glue on both sides of the second stave, and glue to the first stave. Make sure the stave is right-side-up (the numbers are on the same side).
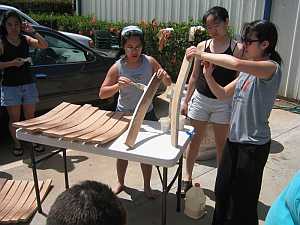
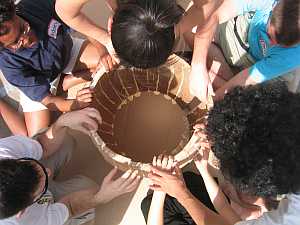
- Continue with all the staves. This is a messy job, and it is considerably easier with lots of helping hands. Have 2 people gluing, and have 4 or more people holding the glued staves in as round a shape as possible. It takes a while for the glue to hold, and until the barrel is reassembled, the individual staves will constantly be sliding out of place. Don't be afraid to get your hands dirty.
- When there are only a few staves left, pull up the bottom ring to help hold staves in place and achieve roundness. If you are having trouble getting the barrel glued together, Mark Miyoshi recommends gluing the staves together in sections to simplify the process.
- For the last stave, put glue on both sides of the stave and also put glue on the non-glued side of the first stave.

- After gluing the staves together, place the top ring on and cinch it down with the hammer and crowbar.
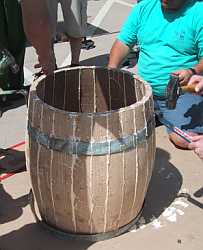
- Flip the drum over and cinch down the other ring (work quickly before the glue starts drying so that you can wipe off the excess glue so it's easier to sand).
- Step back and check the barrel out for roundness and flush staves. Adjust the barrel accordingly: if the barrel is oval, there are probably open spaces between some of the staves. Move around the barrel to make sure it is not leaning in any direction.
- Use measuring tape to check and make sure the diameter is consistent. Shoot for variation within 1/2" from the outside edge; sometimes this is a problem because the staves are of different thickness.
- Wipe the excess glue off with a wet rag so that when you sand the barrel it doesnŐt gum up the sand paper.
- If the rings tend to slide off, duct tape them to the barrel. This might mean the rag that was used to wipe the excess glue was too wet.
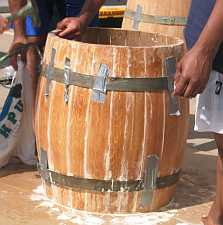
- Let the barrel dry standing up.
- If the rings keep falling off, let the glue dry a little and then cinch down the ring.
- Let the staves dry for 2-7 days.
- Remember the most important things for gluing the barrel: 1) Keep the outside diameter consistent within 1/2", 2) Keep the outside edges of the staves touching, 3) Make the drum vertical.
|
 Introduction
 Process