Videoconference Set-Up Information
Thursday May 9, 2012 (CO)
Last Updated: Friday December 12, 2014 (CO)
 Basic Technical Information to Provide the "Other End":
Equipment: Logitech Lifesize Room 220.
Protocol: H.323.
Connection: IP only; ISDN not supported.
IP address: 171.67.82.65 (DNS alias: oasis.stanford.edu)
Multi-point Capable: YES
Auto-Answer: Set to ON for the first connection (does not auto-answer later connections in a multi-point call)
Videoconference: Just the Basics
Thursday May 9, 2012 (CO)
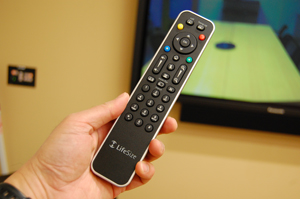
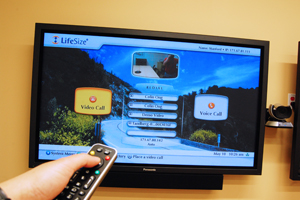 You should typically find the videoconference system in sleep mode. To wake the system, press any button on the LifeSize remote.
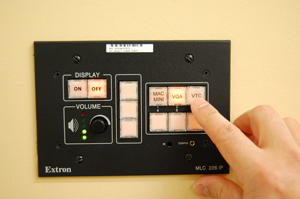 To power on the monitor on the right, use the ON button on the wall panel. Also select the VTC button to set the image input to the videoconference source.
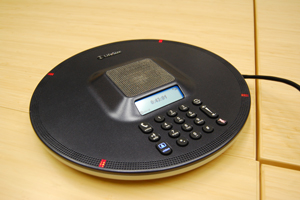 The speaker and microphone is in the LifeSize Phone unit on the table. If the LEDs on the unit are red, then the system is on mute. Use the mute button on the LifeSize Phone or LifeSize remote control to disengage the mute mode (the LEDs will turn blue).
Videoconference: Camera Control
Thursday May 9, 2012 (CO)
 Tilt and pan the camera using the cursor buttons on the LifeSize remote control.
Zoom in and out using the zoom rocker key on the LifeSize remote control.
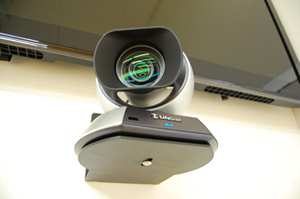 Switch to the rear camera by pressing the "input" button on the remote once, then use the left or right cursor arrows to navigate to the desired camera. Complete the selection by pressing the "OK" button.
Videoconference: Hosting a Connection
Thursday May 9, 2012 (CO)
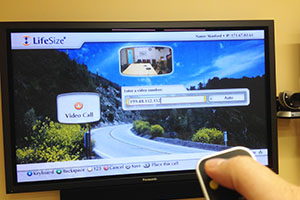
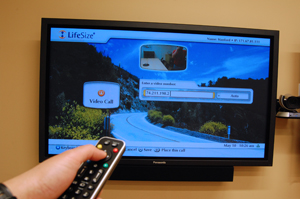 To initiate a connection,navigate to the Video Call button on the screen, then press the "OK" button. Enter the IP address of the unit to connect to using the numeric keypad on the LifeSize remote control.
To end the call, press the "hang up" button and confirm by pressing the "OK" button.
Videoconference: Connecting a Presentation Laptop
Tuesday May 15, 2012 (CO)
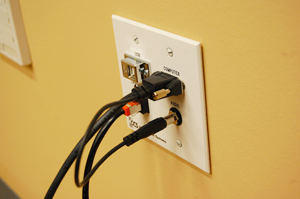 You can connect a laptop's VGA output to the monitor on the right by attaching a VGA cable from your laptop to the socket labeled COMPUTER. You can also connect an audio cable from your computer to the socket labeled AUDIO (audio will play from the sound bar on the left monitor).
On the wall panel, select the ON and VGA buttons. The wall panel's volume dial can be used to amplify your audio.
TELEconference: USING THE PHONE FEATURE
Wednesday May 16, 2012 (CO)
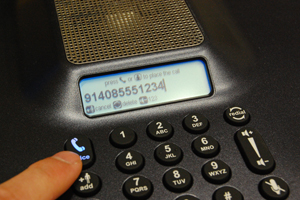 The LifeSize Phone (650 725 9751) can be used either: (1) in a teleconference only, or (2) in tandem with a videoconference.
To dial out, enter the phone number then press the VOICE button.
To accept an incoming call, press the VOICE button on the LifeSize Phone.
DESKTOP VIDEOCONFERENCING: SKYPE
Friday May 25, 2012 (CO)
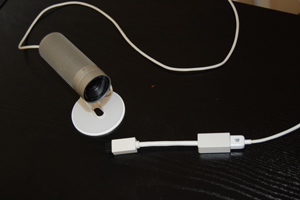 An Apple iSight camera can be attached to the mac mini in the cabinet. However, the mac mini has a FW800 port and the iSight uses a FW400 connector. Therefore, a Firewire 800 to 400 adapter is needed. An iSight camera and the adapter should be stored in the cabinet.
 You will have to connect the iSight camera with the adapter to the back of the mac mini. Next, make sure that the Wall Panel's ON and MAC MINI buttons are selected. Also, adjust the volume control to the 3 or 4 green LED level.
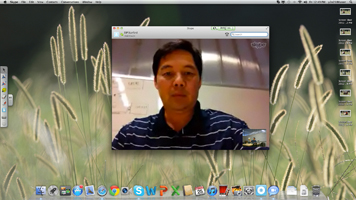 Skype is recommended for desktop videoconferencing. FaceTime and iChat are also loaded on the mac mini.
When done, turn OFF the monitor using the Wall Panel, then disconnect the iSight with the adapter from the mac mini and store it in the cabinet.
BRIDGING TO GOTOMEETING
Tuesday September 6, 2012 (CO)
 Use GoToMeeting or a similar audioconferencing service to bridge with the LifeSize system to provide connectivity for multiple participants needing to join the conference by telephone or a remote laptop.
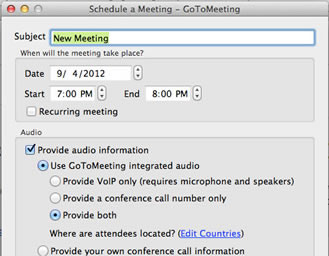 Schedule a GoToMeeting meeting, and email the connection information to participants.
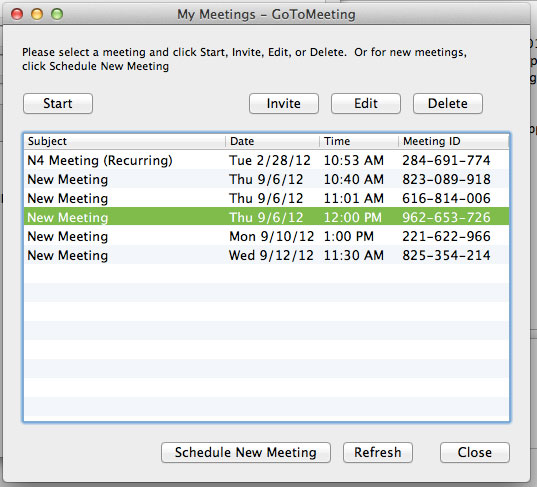 As the meeting organizer, start the GoToMeeting meeting.
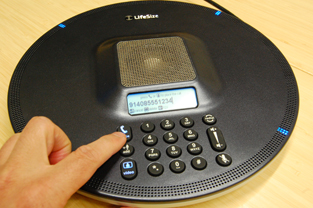 If there is already a LifeSize videoconference connection, press the add button on the LifeSize phone, then dial the GoToMeeting phone number. Otherwise, press the voice button on the LifeSize phone, then dial the GoToMeeting phone number. Enter the meeting Access Code when prompted.
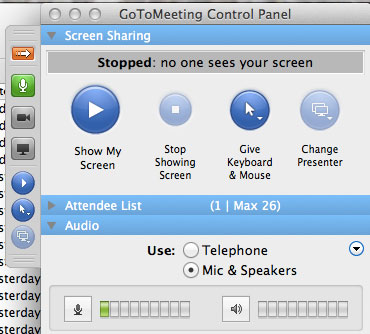 In order to eliminate audio feedback between the GoToMeeting organizer computer and the LifeSize Phone, click the green microphone button in the GoToMeeting Control Panel to mute the microphone. Also, use your computer's volume control buttons to mute your speakers. The LifeSize Phone will handle all audio in the room.
TELEconference: 3-PARTY CONFERENCE CALL
Thursday November 20, 2014 (CO)
The LifeSize Phone (650 725 9751) can be used with Stanford's 3-Party Conference Call feature for single line phones.
1. Press the VOICE button.
2. Dial the first phone number.
Wait for the party to answer.
3. Press the ADD button.
4. Dial the second phone number. Wait for the party to answer.
5. Press the ADD button. All parties should now be in the conference call.
WORKING WITH THE STANFORD FIREWALL
Monday April 20, 2015 (CO)
Our LifeSize Room 220 is located behind the Stanford Firewall and it is configured with specific ALLOW/DENY rules to the unit's IP address.
In some situations, the IP address has to be changed and we would send Ed Jones a request to update the Stanford firewall rule. Turnaround for the modification is about 1 or 2 days during which time incoming calls may be unable to connect. If possible, initiate the connection as a workaround.
For detailed information on working with a firewall, read Configuring your LifeSize System for Firewall Traversal.
CLOUD-BASED VIDEOCONFERENCING: BLUEJEANS HOSTING
Friday October 30, 2015 (CO)
 The following instructions are for hosting a Bluejeans videoconference using the LifeSize system in Y2E2 180 as the host system. Using your laptop, log in to your Bluejeans account at stanford.bluejeans.com. Select "Start Instant Meeting."
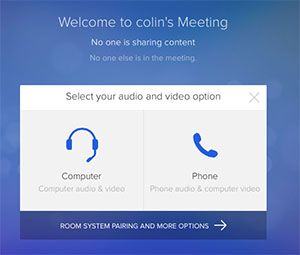 In the "Select your audio and video option" window, click on "ROOM SYSTEM PAIRING AND MORE OPTIONS."
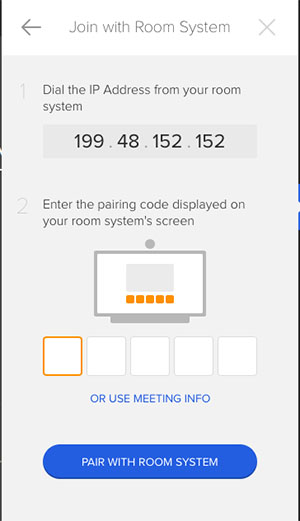 In the "Join with Room System" window, note the IP address.
 Make a video call connection to the IP address through the LifeSize system.
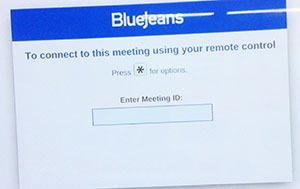
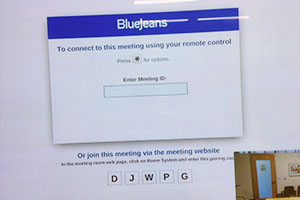 After the connection is made, notice the 5-letter code on the LifeSize monitor.
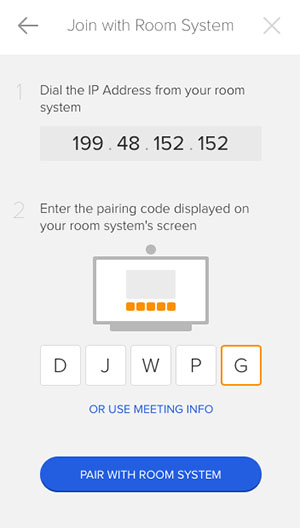 Enter the 5-letter code on your laptop, then click "PAIR WITH ROOM SYSTEM."
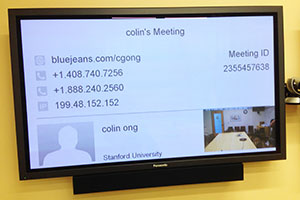 When the LifeSize system is paired for hosting, connection information will be shown on the LifeSize system display.
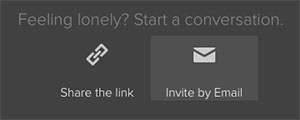 After the LifeSize system is paired, your laptop will give you an opportunity to send invitations to participants through the Bluejeans web site.
CLOUD-BASED VIDEOCONFERENCING: BLUEJEANS PARTICIPANT
Friday October 30, 2015 (CO)
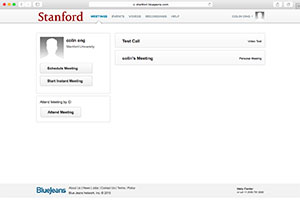
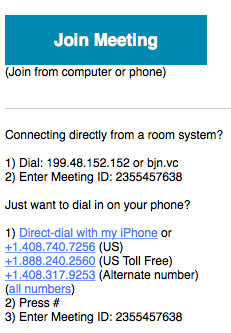 As a participant in a Bluejeans videoconference, you may have received a Bluejeans email invitation. If you wish to join from your laptop, click on the "Join Meeting" button. To connect the LifeSize system in Y2E2 180, note the information under "Connecting directly from a room system?"
Connect to the IP address listed in the email using Video Call on the LifeSize system.
 On the LifeSize system, enter the meeting id that is shown in the email invitation.
CHECKING FOR LOOSE CABLE CONNECTIONS
Wednesday October 5, 2016 (CO)
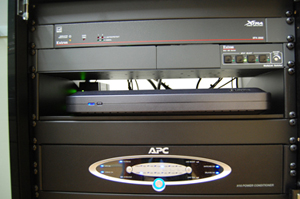
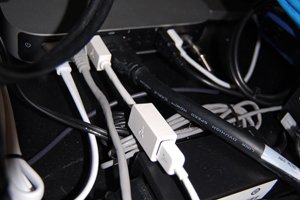
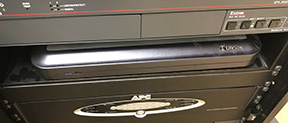
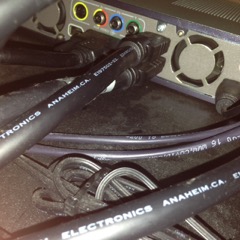 If you are experiencing trouble with the LifeSize video cameras or the Panasonic displays, check the cable connections on the back of the LifeSize CODEC (the videoconference appliance inside the cabinet). Access the connection panel from the back of the cabinet. Look for any loose or disconnected cables. It is best to re-seat the cables with one hand while using the other hand to hold the CODEC steady through the front of the cabinet so that the CODEC is not pushed forward on the shelf. If the CODEC is too far forward, it will be difficult for the cable to reach the CODEC and it will be more prone to dislodging again. The cables most likely to be the problem are the HDMI cables which are held by friction and not screws. In the picture shown here, they are the cables to the left of the fan exhaust.
CLOUD-BASED VIDEOCONFERENCING: ZOOM
Friday May 5, 2017 (CO)
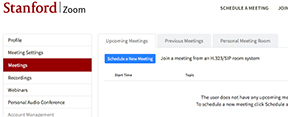 Our LifeSize Room 220 system can be connected to the Zoom Web Conferencing Service. Start by logging in at http://stanford.zoom.us on your laptop using your Stanford credentials; click on Meetings in the left navigation column. You will next need to start or schedule a meeting by clicking on the "Schedule a New Meeting" button or the "Host A Meeting" menu in the top right corner of the window. This will provide you with a Meeting Number and IP address to use for the connection.
Click on the image to see an enlarged view.
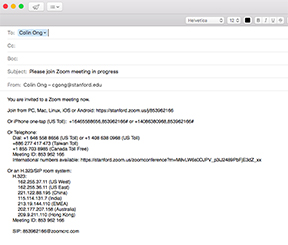 Use the "Invite" function to get a summary of the connection information. In the picture to the right, the connection information is shown in an email. The main things to notice are the Meeting ID and IP address for US West.
Side Note: There is an iOS app for this service which enables your iPhone/iPad to connect as well. It is available in the App Store.
Click on the image to see an enlarged view.
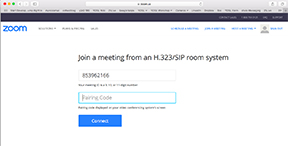 Click on the "Join a meeting from an H.323/SIP room system" link on the Zoom browser window on your laptop. You will get a window where you enter the Meeting ID and a Pairing Code. You can enter the Meeting ID you obtained earlier.
Click on the image to see an enlarged view.
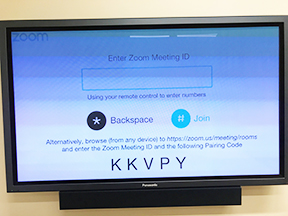 Next, connect the LifeSize Room 220 to Zoom using the IP address from the email invite shown earlier. You will get a screen where you can enter the Meeting ID and a Pairing Code (with instructions to browse https://zoom.us/meeting/rooms from your laptop). Note that if you wish to enter the Meeting ID on the LifeSize screen, you have to start with a "#" and end with a "#" for it to work (it's mentioned in the audio message when this screen appears).
H.235 security FOR ENCRYPTED CONNECTIONS
Saturday May 6, 2017 (CO)
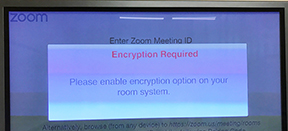 While testing compatibility with Zoom web conferencing, an "Encryption Required" prompt appeared. To meet this requirement, H.235 AES Security was set to "Enabled" on our LifeSize Room 220 in the Administrator Preferences : Security : General preference window. "Enabled" means "...calls connect, but are encrypted only if the far end supports AES encryption."
BLANK SCREEN? CHECK THE HDMI CONNECTIONS
Tuesday March 3, 2020 (CO)
 HDMI connectors rely on friction instead of being clipped or screwed on. Therefore, the HDMI cables on the back panel of the LifeSize codec have had a tendency to disconnect due to shifting the cabinet. So #1 tip is to not move the cabinet. When re-attaching the cables, check first from the front that the codec is sitting behind the lip of the tray. If it is sitting far forward over the lip, the cables are difficult to re-attach.
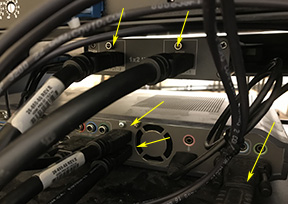 There are 5 HDMI cable attachment points: 3 are on the back panel of the codec and 2 are on a device above the codec. Check that each one is attached correctly.


 Y2E2 180 is an Environmental & Water Studies Conference/Seminar Room. Primary use is for videoconferences or teleconferences by EWS personnel. Classes, group meetings and guest use are also welcome when the room is available.