


How to Import Your Certificate and Keys
Note: encryption can result in irretrievable loss of data if the keys/passwords are misplaced or destroyed; consult a qualified system administrator if you feel you need assistance.
How to Import Your Certificate and Keys
If you've opted to remove your keys from your computer, you will need to have the removable media with your key every time you want to access the file. After accessing the file, you will need to remove the key from your computer again. This is most useful for mobile users with laptops where the private key is initially removed before transit, and imported back to the laptop to use the file.
To import your keys from the computer:
- Launch the Microsoft Internet Explorer web browser.
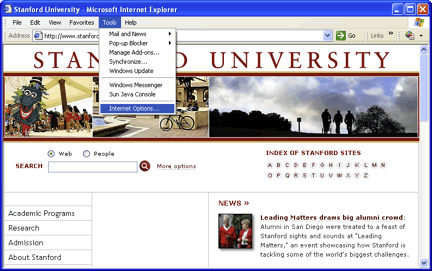
- From the Tools menu, click Internet Options.
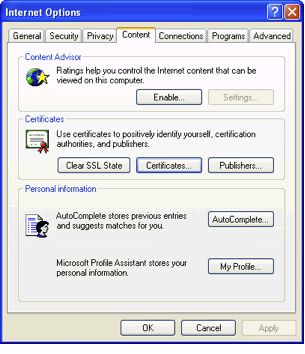
- On the Content tab, in the Certificates section, click Certificates.
- The Personal tab comes up by default.
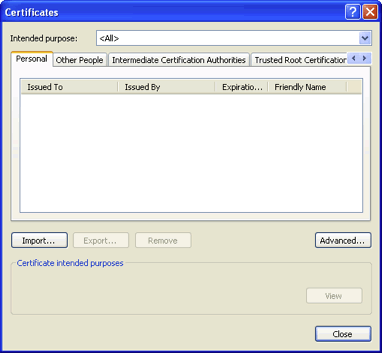
- Click the Import... button.
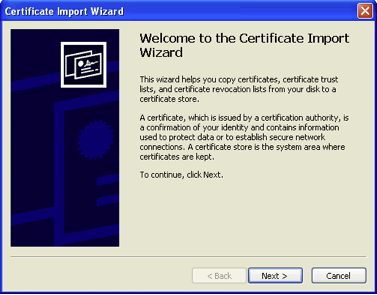
- The Certificate Import Wizard opens. Click Next.
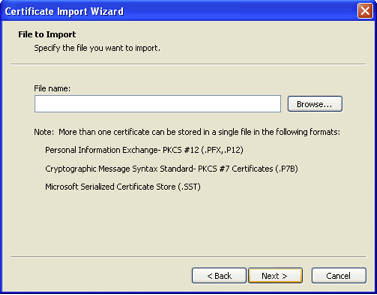
- Click the Browse button.
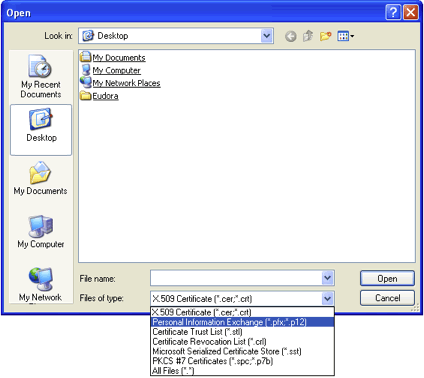
- Select the Files of type drop down box. Choose Personal Information Exchange (*.pfx,*.p12).
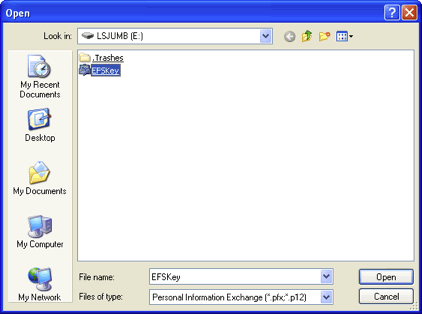
- Navigate to your removable media drive and select your file.
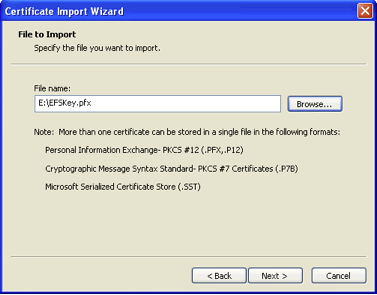
- Click the Next button.
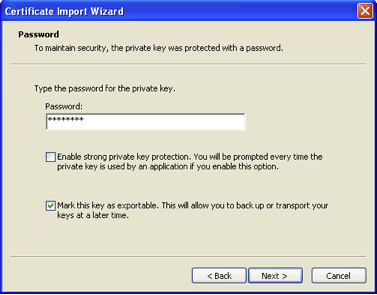
- Type the password for your key. Check the Mark this key as exportable checkbox and click Next.

- Be sure that the Place all certificates in the following store radio button is selected and that the Certificate Store is Personal. Click Next.

- Click the Finish button.
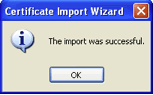
The Certificate Import Wizard confirmation window appears. - Click OK.
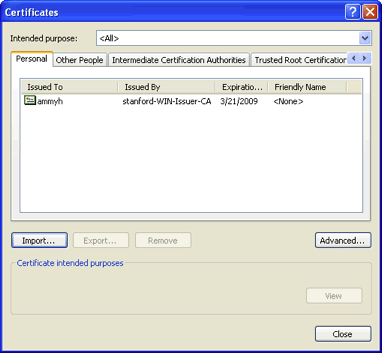
- Click the Close button in the Certificate window.
- Click OK on the Internet Options window.
Video Helplet
To see how to import your certificate and keys, view this video helplet
If There's No Back-up...
If something goes wrong (you lose your removable media or it is damaged), your DRA can still recover your files. Submit a HelpSU request for assistance. Additionally, if you have permitted other users to EFS share your encrypted files, those users can recover your data.